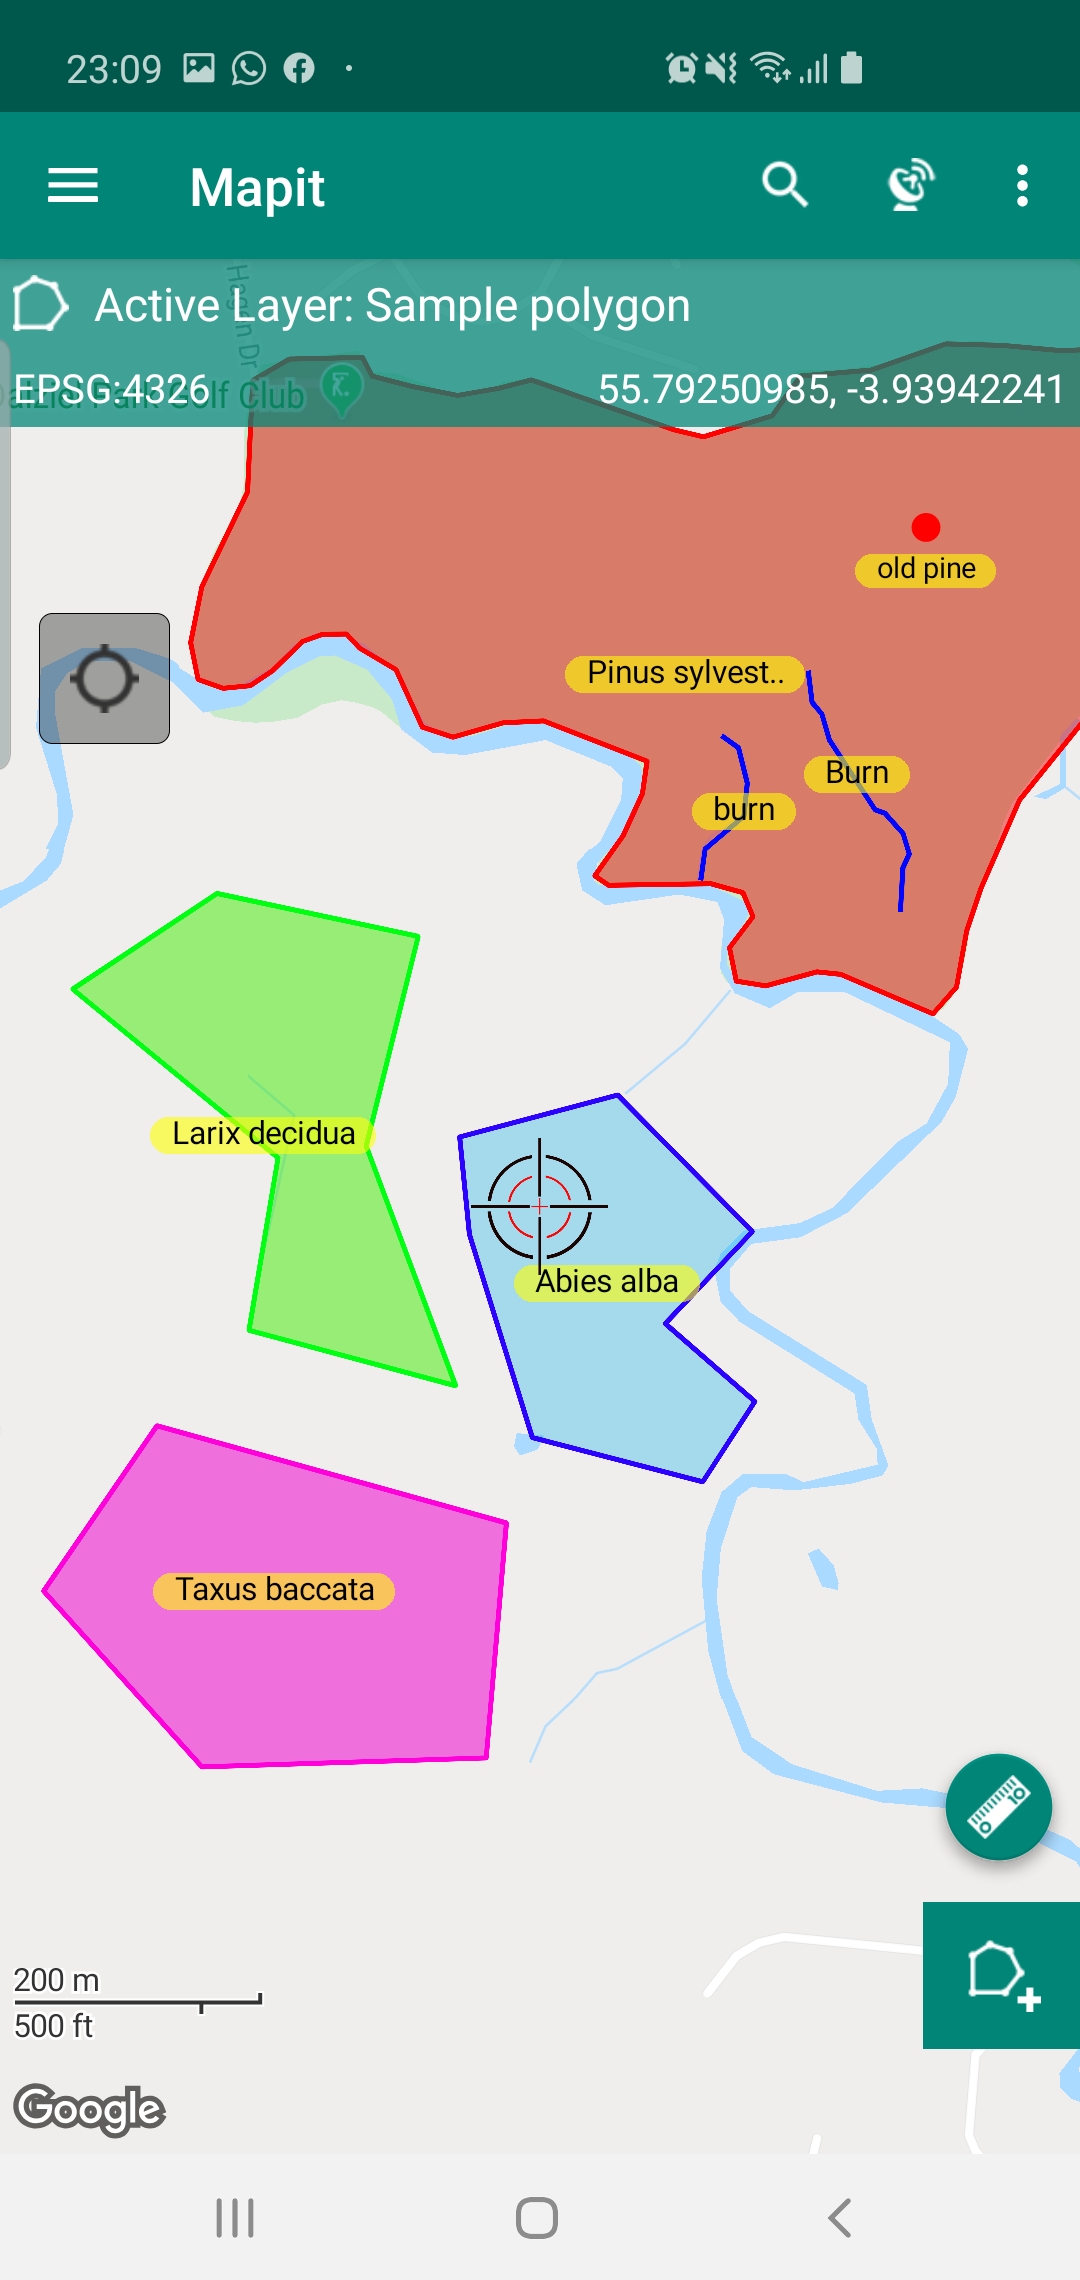
Rendering features using styles applied to field values.
There are 2 ways of defining the style for map objects in Mapit Spatial:
- Default symbology for the layer can be set in Layer Management – in this case all the geometries on the map will be rendered using the colour scheme defined in layer properties.
- Symbology based on the field value – different features in the same layer can have multiple styles defined and derived from the field value.
The method 1 above has been described in details in Layer Management Section of this guide and to learn how to use properly method 2 please see the text below. We will utilise an example to demonstrate how the “field based” styling works.
Let’s say you are responsible to carry on an environmental survey and would like to style differently polygons related to particular tree species, for example you would like to show areas grown with:
- Pinus sylvestris in red,
- Abies alba in blue,
- Larix decidua in green and
- Taxus baccata in pink colour.
The same methodology can be utilised for number of things like numeric values of the cable type, ground maintenance tasks etc.
To achieve the above task please open “Manage Styles” section from the navigation drawer of the app and create 4 new styles. To create a style please press “Add” button.
For each style you need to provide a name and define two colour parameters:
- Colour – this will be used to render point, line or polygon outline – depending to which type of layer the style would be applied.
- Fill Colour – this colour would be used to render polygon fill. It is useful to define some kind of transparency, so you still be able to see some basemap content below the polygon shape.
Hint: The styles can be defined ones and used in multiple layers.
The style will be automatically saved when you press ‘Back’ button.
For our purpose we will create 4 styles and we will call them red, blue, green, pink

Created styles can be edited or removed when required.
To link the styles with the field values we need to do few additional things:
- Attribute set containing predefined values for the field entries. – see attributes management section of the PDF guide for more details.
- Feature layer containing the linked field to the appropriate attribute set and its field marked as styled.
To achieve above steps please navigate to the attribute set containing the field “species” or add the field if it does not exist and select the field from the list. Please use “Mark as styled” option from the context menu to indicate that this field will be used for styling.
NOTE: Multiple attribute set fields can be marked as “styled”
When the attribute set field is marked as “styled” the brush icon will be displayed on the right side of the field. To continue, select the “species” field and edit its values or add new if necessary.
To assign the style to particular value please select the value and press “Add Style” from the context menu and choose relevant value from the list.
At the end of this process we should have our values linked to the styles created on the beginning:

The last step is the modification of the configuration for the layer containing the field we want to use for styling – in our case we add the field called “species” of type TEXT to the feature layer – see layer management section for more details.
For our purpose we link the database field “species” with the attribute set field “species”. – Please read more about the linking the field with the attribute set in Layer Management section.
Following the linking a “chain” symbol will be displayed next to the database field name.
When the field is linked and of supported type TEXT, INTEGERs or DOUBLE it can be used for styling – select the “species” field and choose “Mark as Styled” from the context menu – Appropriate icon will be added on the left side of the field name.

NOTE: Only one field in the layer can be marked as “styled”
When you get to the map features will be styled according to the configuration

Please watch the video below to see the process applied above.

